Using Go for Multi Arch Kubernetes - Part 3
Posted on by Charles Burton
Part 3 - Automating Multi-Arch Builds Using Github Actions
This is Part 3 of a series on building out multi-arch services in Kubernetes using Golang. I highly recommend reading Part 1 and Part 2 prior to working through this entry. The first two will provide you with the background on how to build a multi-arch container using Go whereas this one concerns automating the build process. For this guide there is also a supplementary Github repository containing the working example code, it can be found here github. Clone and migrate the repo to your Github account renaming the secrets and variables where appropriate.
Now that we have the ability to build multi-arch containers and upload them to Dockerhub it’s time to automate the process.
In this section we will cover only the portions related to automating the build and not the testing or deployment of an artifact.
The end state will be a container in Dockerhub tagged as latest that supports multiple CPU architectures. We’ll only cover the three
most common on x64, ARM, and ARM64 but this will be easily extensible to other architectures as well.
First ensure that you have a Github account setup and have initialized a repo with the following code that creates a very simple JSON endpoint service. You’ll recognize the code from Part 1.
package main

import (
	"encoding/json"
	"log"
	"net/http"
)

type APIReq struct {
	Hello string `json:"hello"`
}

func main() {
	log.Println("Starting simple API service")
	http.HandleFunc("/", apiRequest)
	log.Fatal(http.ListenAndServe(":10000", nil))
}

func apiRequest(w http.ResponseWriter, r *http.Request) {
	log.Println("Received, request")
	var apiReq APIReq
	apiReq.Hello = "world"
	json.NewEncoder(w).Encode(apiReq)
}
In this case we’re only using the standard library, if you extend it beyond the standard library ensure that you have a go.mod and
go.sum setup in your project root. If you’re unsure on how to proceed with go modules the relevant guide is here.
The important parts for this guide are the new directory structure of .github/workflows. Github will automatically pick these up to run
your workflow when you build it. Additionally this repository has been configured to be a mono-repo, that’s why the code is in a subdirectory.
Mono-repo will be a further blog post/series. Once you have the directory structure it’s time to configure the secrets for pushing containers to Dockerhub.
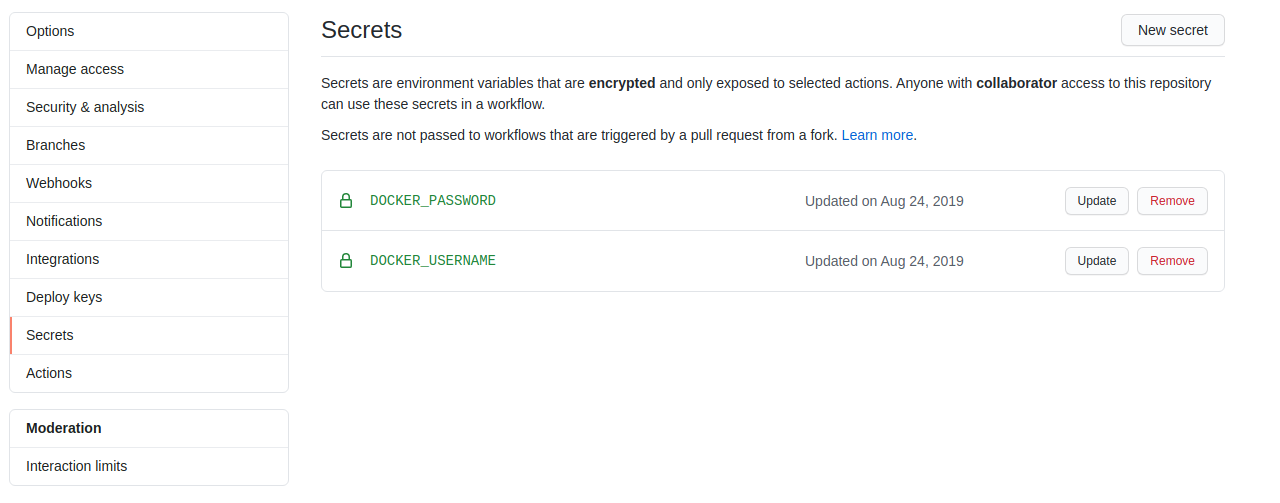
In your project on Github navigate to Settings -> Secrets and create two new secrets:
With those in place we’re ready to get started on constructing the build pipeline. In the workflows directory we created above we need to create
a YAML file to define build pipeline. Create a file called build-example.yml with the following contents, replacing your docker tags to match your
repository:
name: ExampleBuild

on:
  push:
    branches:
    - master

jobs:
  example-build-amd64:
    runs-on: ubuntu-latest
    name: Build amd64 version of example service
    steps:
      - uses: actions/checkout@v1
      - name: Docker Login
        run: docker login --username=${{ secrets.DOCKER_USERNAME }} --password=${{ secrets.DOCKER_PASSWORD }}
      - name: Build amd64
        working-directory: build-example
        run: DOCKER_BUILDKIT=1 docker build -t <YOUR REPO>:amd64 --target=amd64 --file=./Dockerfile .
      - name: Push Image
        run: docker push <YOUR REPO>:amd64
For a refresh on the Dockerfile itself see Part 2. In the above example YAML file we’re performing a very simple task, simply building the Docker container and pushing it to a repo. Breaking down the steps we have:
- On a push to master, run the jobs defined
- Build an AMD64 version of the container
- Push the tagged container to Dockerhub
There’s one variable in there that you may not have seen before and it’s appeneded to the front of the command DOCKER_BUILDKIT=1. This variable instructs
Docker to build the container with additional experimental options that we will discuss in the next steps. Additionally in the second step there is a YAML
parameter defining the working directory, this ensures that we are only woking in the build-example directory.
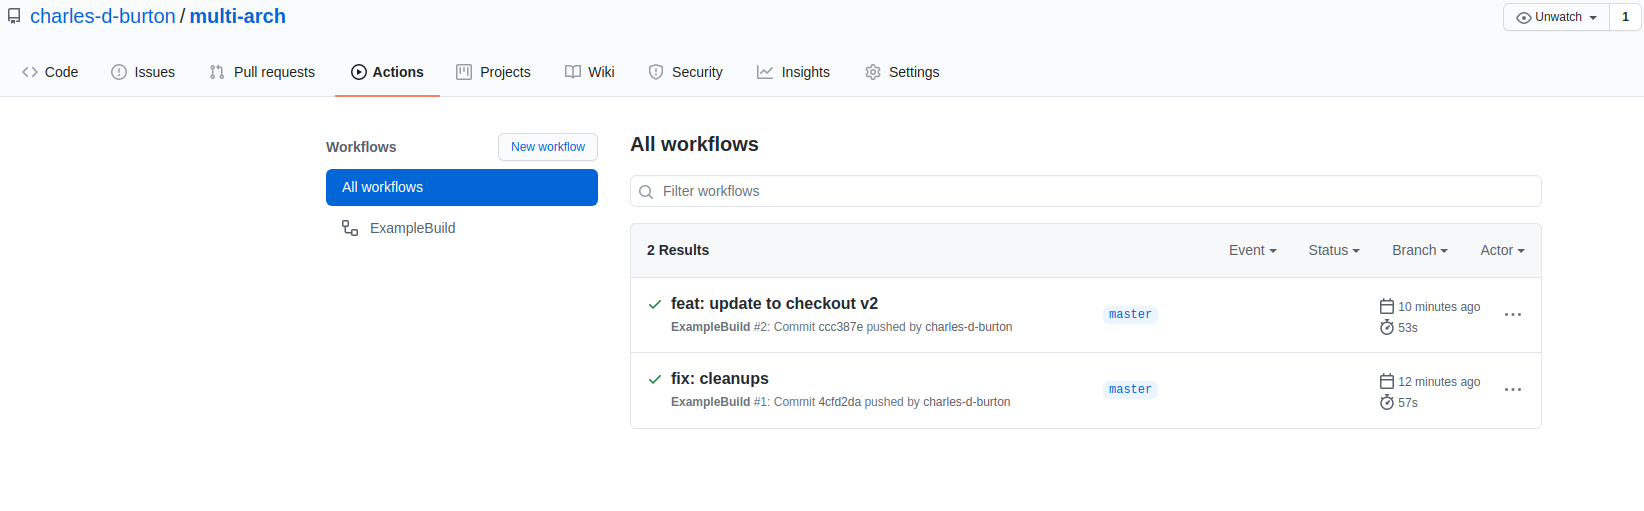
Once you have this building, you should see something like the following in Github:
Let’s extend this to peforming builds for three CPU architectures now. This is largely an exercise in copy/paste from the above workflow. We’re going to break
them out into separate builds as that allows the workflows system to build them in parallel rather than serially. Update the build-example.yaml to look like
the following:
name: ExampleBuild

on:
  push:
    branches:
    - master

jobs:
  example-build-amd64:
    runs-on: ubuntu-latest
    name: Build amd64 version of example service
    steps:
      - uses: actions/checkout@v1
      - name: Docker Login
        run: docker login --username=${{ secrets.DOCKER_USERNAME }} --password=${{ secrets.DOCKER_PASSWORD }}
      - name: Build amd64
        working-directory: build-example
        run: DOCKER_BUILDKIT=1 docker build -t <YOUR REPO>:amd64 --target=amd64 --file=./Dockerfile .
      - name: Push Image
        run: docker push <YOUR REPO>:amd64

    example-build-arm64:
    runs-on: ubuntu-latest
    name: Build arm64 version of example service
    steps:
      - uses: actions/checkout@v1
      - name: Docker Login
        run: docker login --username=${{ secrets.DOCKER_USERNAME }} --password=${{ secrets.DOCKER_PASSWORD }}
      - name: Build arm64
        working-directory: build-example
        run: DOCKER_BUILDKIT=1 docker build -t <YOUR REPO>:arm64 --target=arm64 --file=./Dockerfile .
      - name: Push Image
        run: docker push <YOUR REPO>:arm64

    example-build-arm:
    runs-on: ubuntu-latest
    name: Build arm version of example service
    steps:
      - uses: actions/checkout@v1
      - name: Docker Login
        run: docker login --username=${{ secrets.DOCKER_USERNAME }} --password=${{ secrets.DOCKER_PASSWORD }}
      - name: Build arm
        working-directory: build-example
        run: DOCKER_BUILDKIT=1 docker build -t <YOUR REPO>:arm --target=arm --file=./Dockerfile .
      - name: Push Image
        run: docker push <YOUR REPO>:arm
Once that is building we’re now able to generate the necessary Docker images, but we’re not quite done. As it stands there’s still a piece missing and that is telling
the Docker repository and Kubernetes that these images are all the same code but for different architectures. For that we need to build out a Docker manifest and
use it to reference all three images from a single place. This can be accomplished by adding the following block as the last step in the build pipeline. This is just
another job with a dependency on the other three completing. Replace <YOUR REPO> with your own configuration.
jobs:
     example-build-manifest:
        runs-on: ubuntu-latest
        name: Collect manifest and push
        needs: [" example-build-arm", " example-build-arm64", " example-build-amd64"]
        steps:
        - uses: actions/checkout@v1
        - name: Docker Login
          run: docker login --username=${{ secrets.DOCKER_USERNAME }} --password=${{ secrets.DOCKER_PASSWORD }}
        - name: Build Manifest
          run: |
            DOCKER_CLI_EXPERIMENTAL=enabled docker manifest create <YOUR REPO>:latest \
            <YOUR REPO>:amd64 \
            <YOUR REPO>:arm \
            <YOUR REPO>:arm64
        - name: Annotate Arm
          run: DOCKER_CLI_EXPERIMENTAL=enabled docker manifest annotate --arch arm <YOUR REPO>:latest <YOUR REPO>:arm
        - name: Annotate Arm64
          run: DOCKER_CLI_EXPERIMENTAL=enabled docker manifest annotate --arch arm64 <YOUR REPO>:latest <YOUR REPO>:arm64
        - name: Annotate AMD64
          run: DOCKER_CLI_EXPERIMENTAL=enabled docker manifest annotate --arch amd64 <YOUR REPO>:latest <YOUR REPO>:amd64
        - name: Push Manifest
          run: DOCKER_CLI_EXPERIMENTAL=enabled docker manifest push <YOUR REPO>:latest
Finally, in Dockerhub we can see that an image was created that lists the three OS/Arch combinations we generated:

This enables Docker to use the experimental CLI as well as the manifest system. Once this runs you will have an image reference in Docker that will allow Kubernetes to automatically select and deploy the correct container for whatever CPU architecture you need to deploy. This is extensible beyond just the normal AMD64 and ARM architectures to any architecture that is supported by both Go and Docker. The next entry in the series will demonstrate how to deploy these containers to a hetergeneous compute cluster on AWS.
